PDF-Export Microsoft PowerPoint - Windows
Set up custom page sizes and PDF export.
Set up document size
Below we will show you how to adjust the page size and export a correct PDF from Microsoft PowerPoint.
-
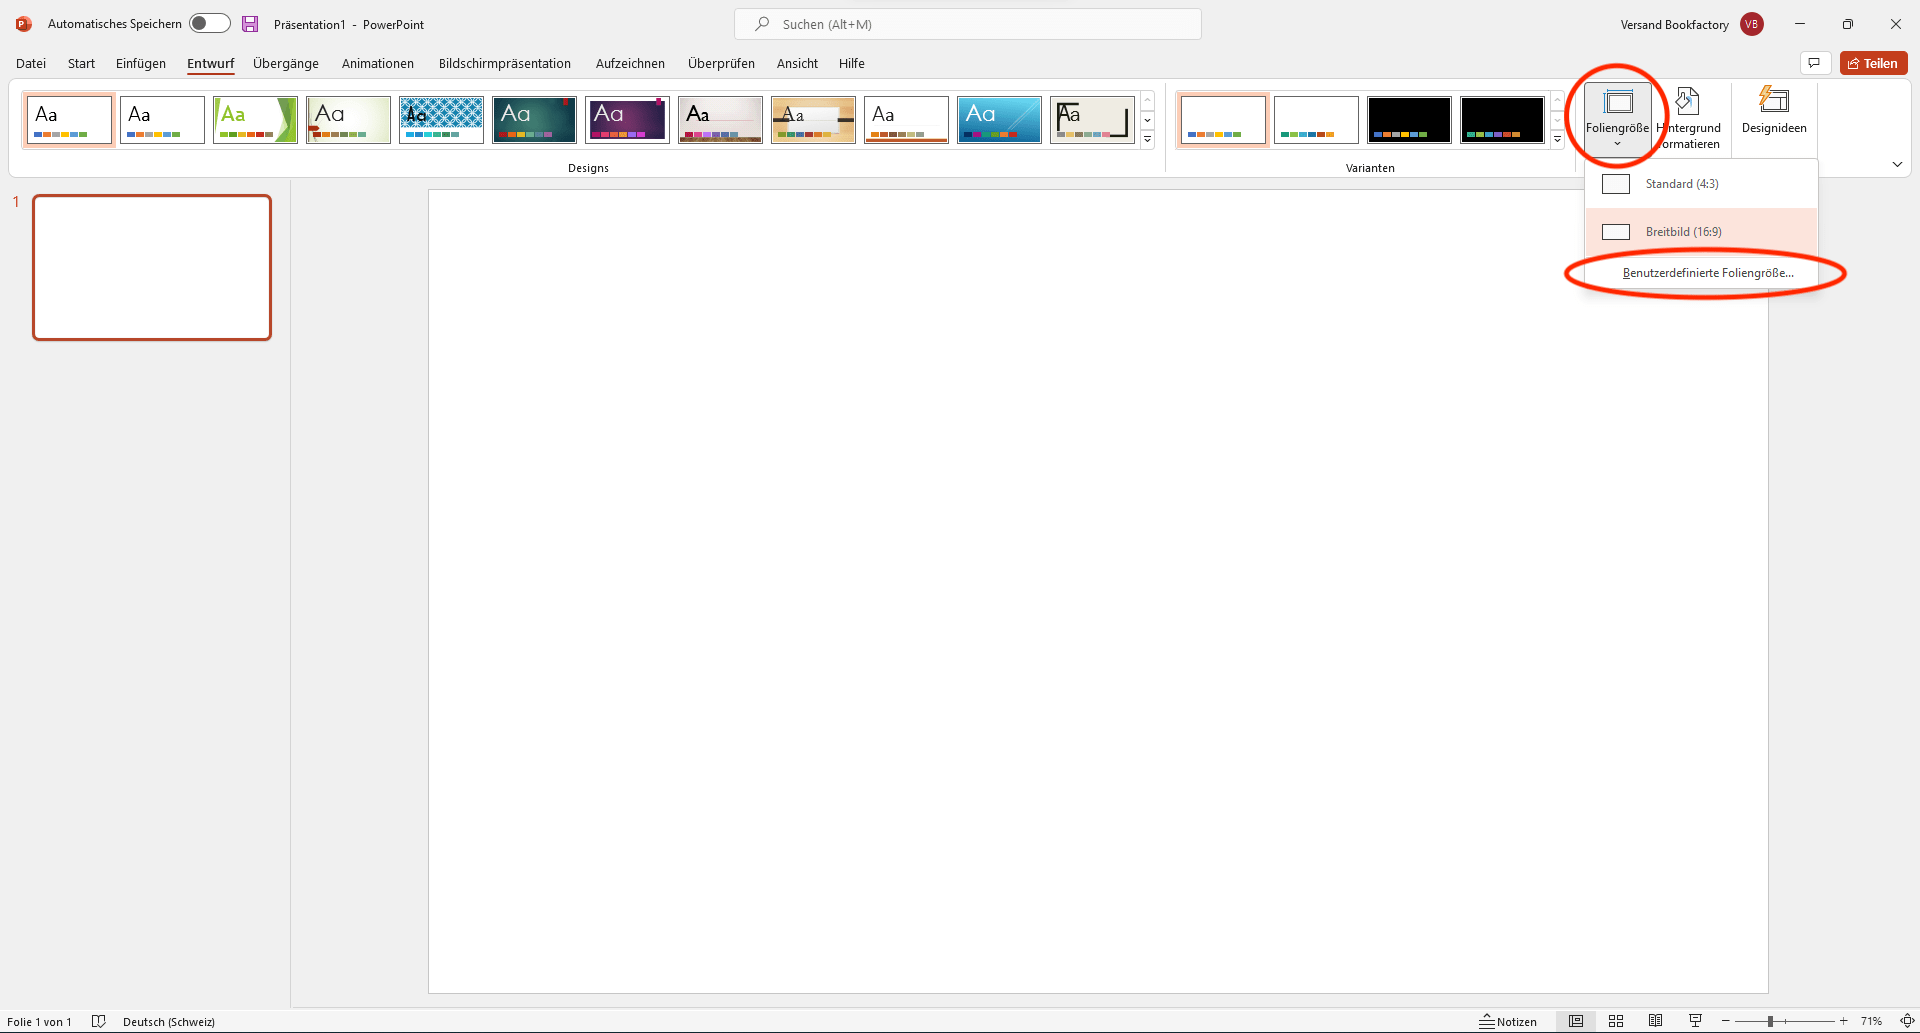
Open a new document in Microsoft PowerPoint and click on «Draft» and then «Slide Size».
-
Select the drop-down and click «Custom slide size» at the very bottom.
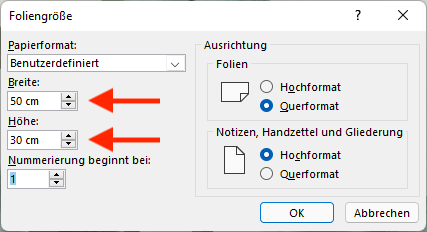
- Set yourself the paper size in the correct size (given in the PDF sample file).
Design
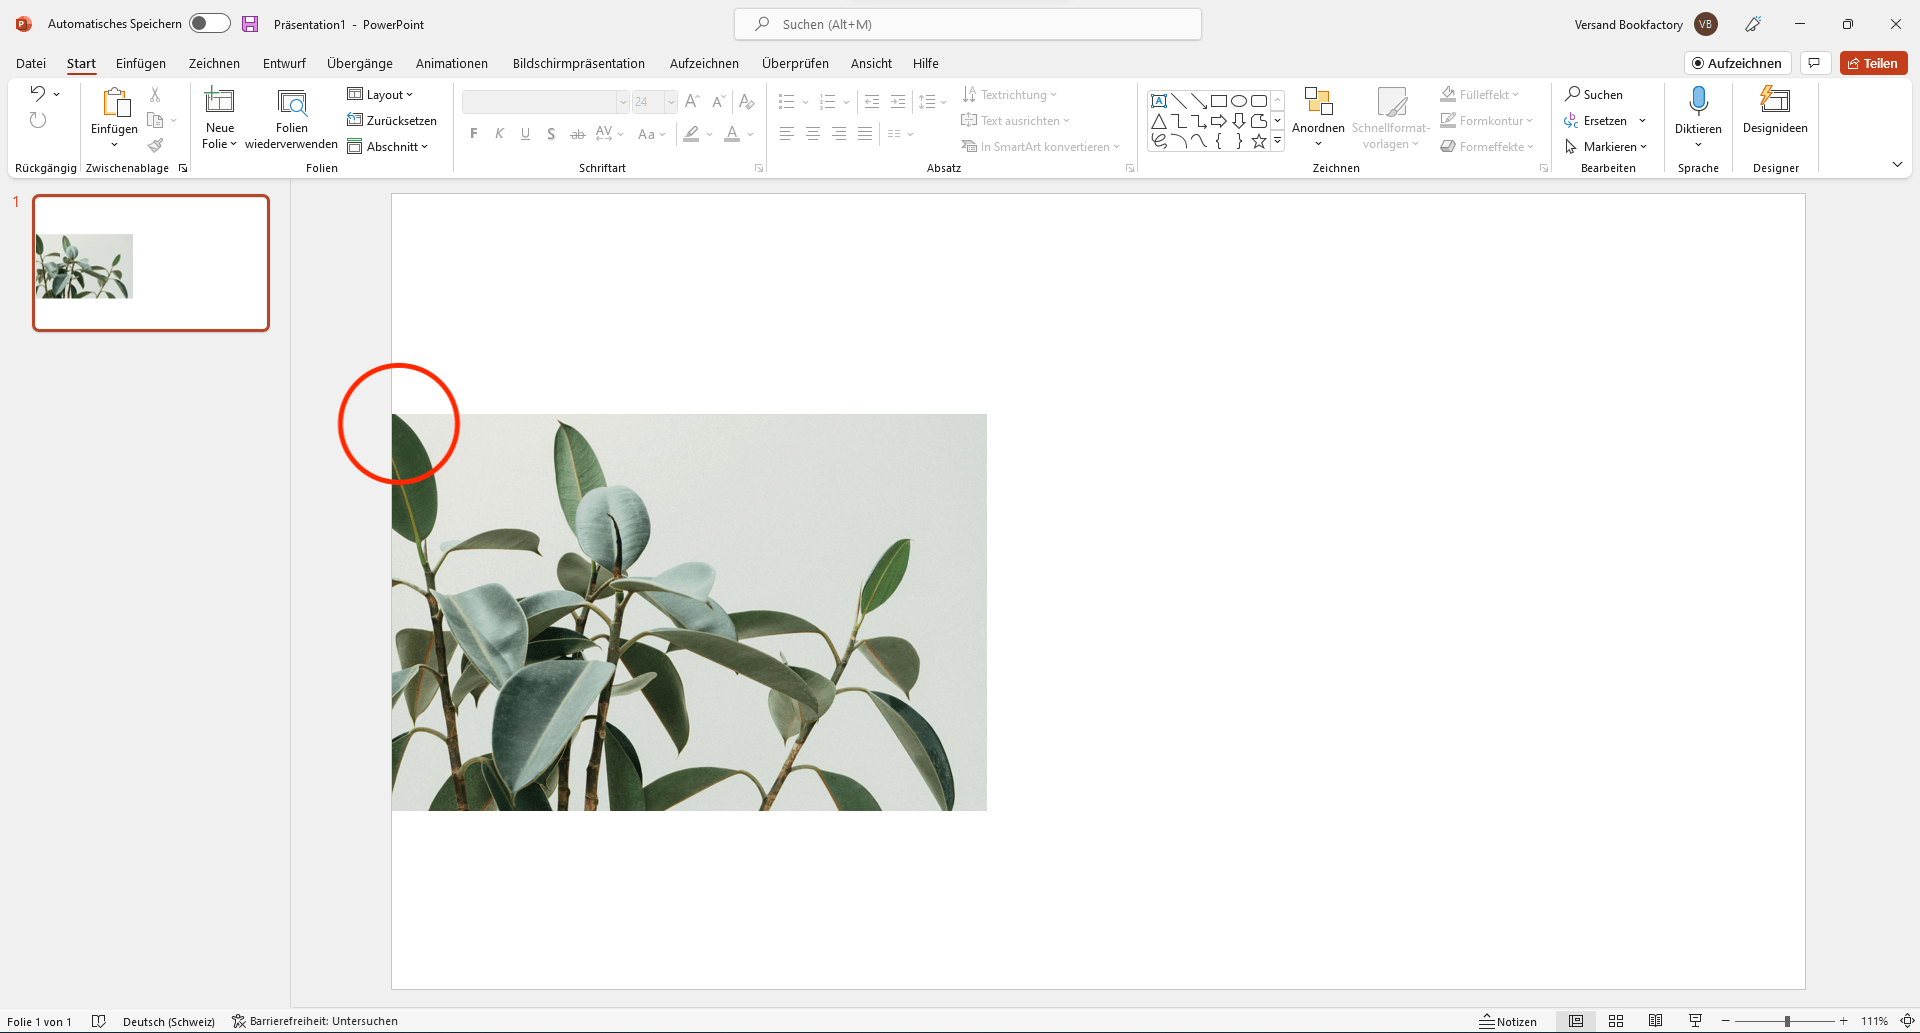
Design your project. Make sure you place correctly the design objects that should have a bleed.
General settings
For the optimal export of your images choose the following settings:
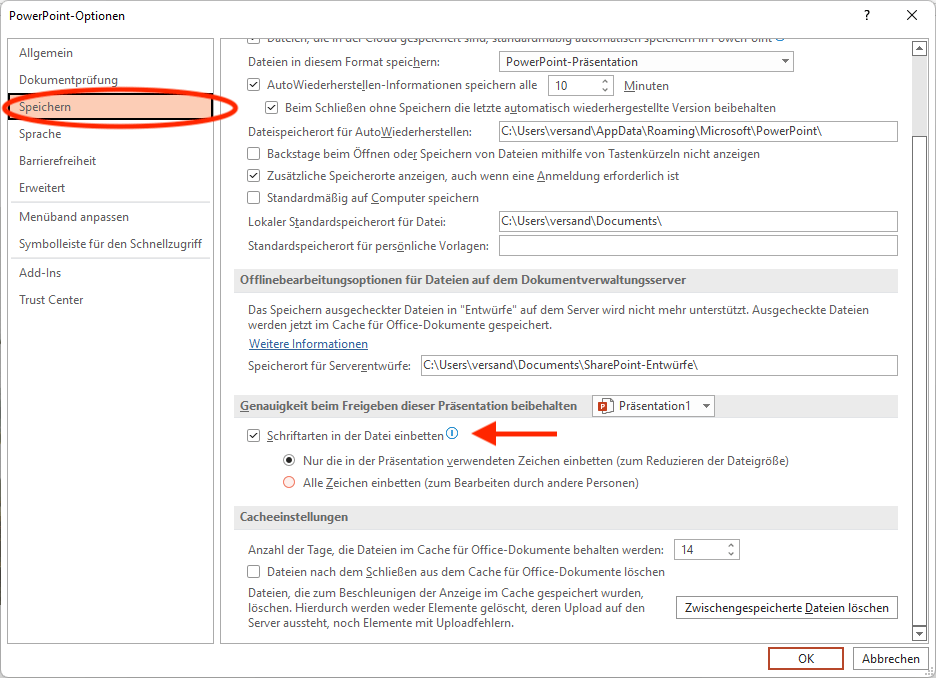
- Click on «File» at the top left and select «Options» at the bottom.
-
Under the «Save» item, check the «Embed fonts in file» box.
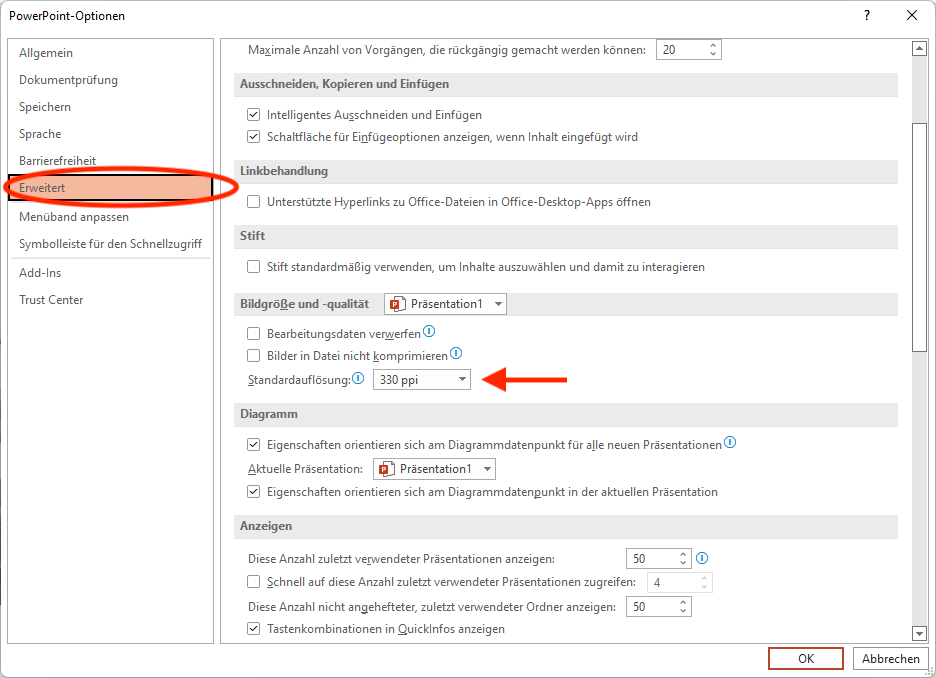
- Then select the «Advanced» item on the left and scroll down to «Image size and quality».
-
There set the default resolution to 330 ppi and confirm with «OK».
Export without Adobe Acrobat Professional
- Click on File «Export» and select «Create PDF/XPS document».
-
In the new window, select the file type «PDF" and «Optimize for: Standard».
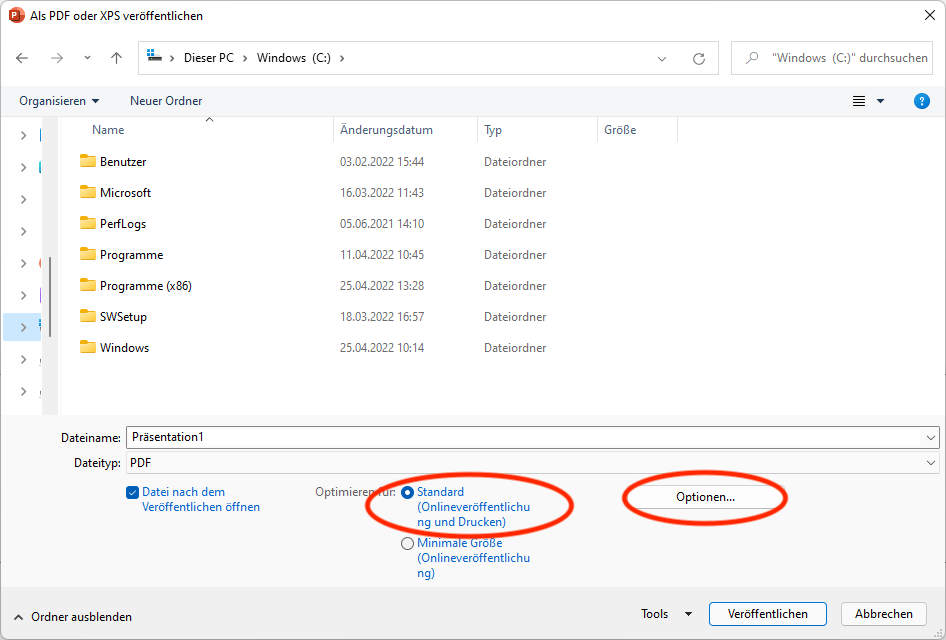
-
Then click on «Options» and check the box at «PDF/A compatible».
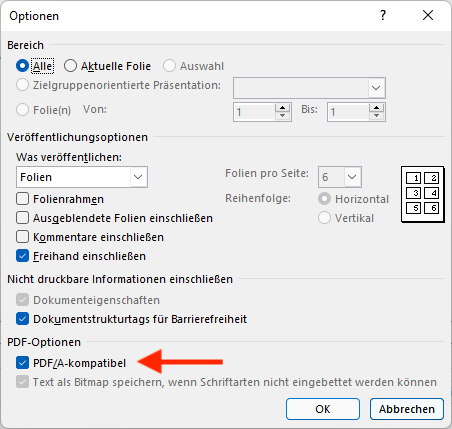
- onfirm with «OK».
- Save the PDF to the desktop.
Export with Adobe Acrobat Professional
- File / Print
- Select the printer «Adobe PDF».
- Navigate to the «Printer properties».
- Select the following option «PDF/X-1a:2001» under the default settings.
- Create and select the correct format for export under Adobe PDF Page Format.
- Save the PDF to the desktop.
PDF-Export Microsoft PowerPoint - Apple
Set up custom page sizes and PDF export.
Set up document size
Below we will show you how to adjust the page size and export a correct PDF from Microsoft PowerPoint.
- Open a new PowerPoint document and click on «File» and then «Page Setup».
-
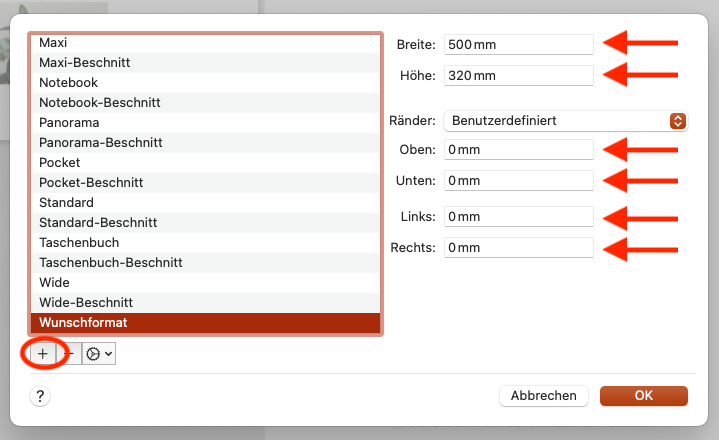
Select the «Slide Format» drop-down and click «Custom» at the very bottom.
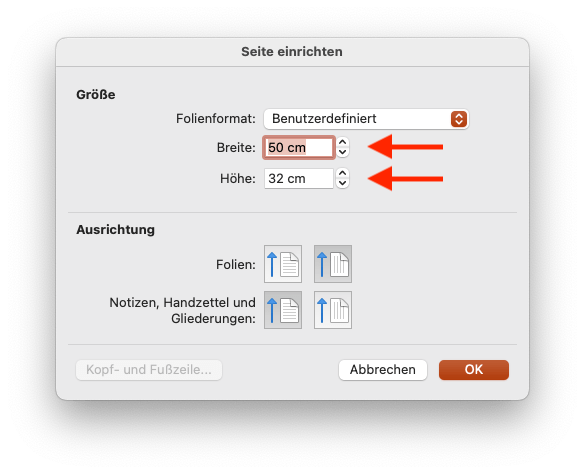
-
Set yourself the paper size in the correct size (given in the PDF sample file).
Design
Design your project. Make sure you place correctly the design objects that should have a bleed.
General settings
For the optimal export of your images choose the following settings:
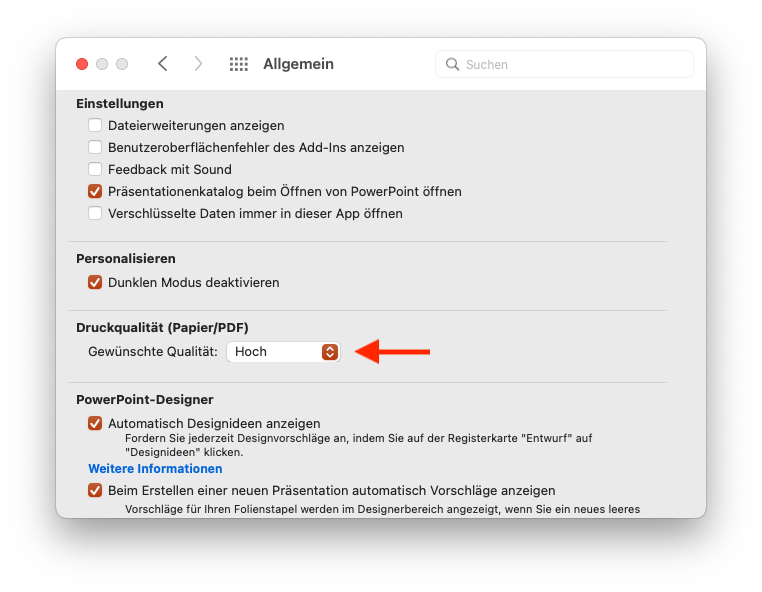
- Click on «PowerPoint» at the top left and select «Settings».
-
Under the «Save» item, check the box «Embed fonts in file».

- Navigate back to the category selection and select «General».
-
Set the print quality there to «High».
Export without Adobe Acrobat Professional
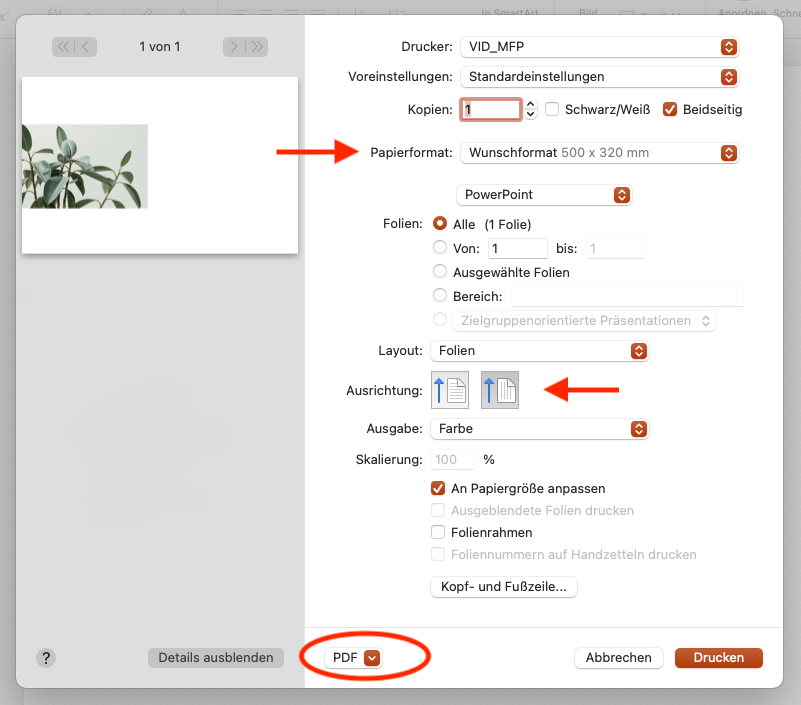
- Click on File «Print».
-
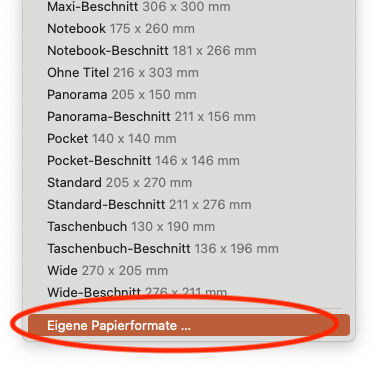
In the Paper Format selection, create a new paper format in the size of the PDF sample file.
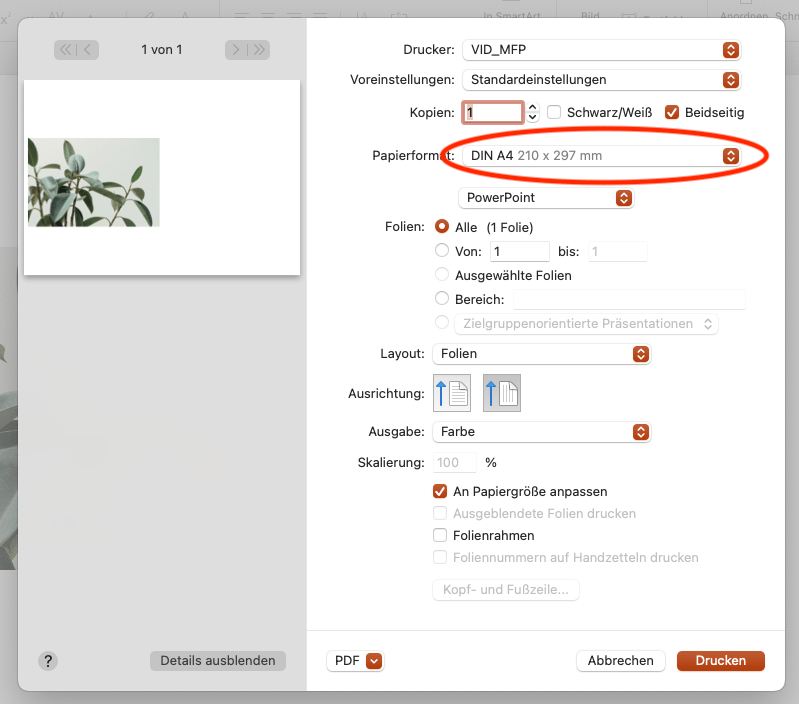
- Choose the correct orientation (portrait/landscape).
-
Select «PDF» at the bottom and then «Save as PDF».
Export with Adobe Acrobat Professional
- Click on file «Print».
- Create a new paper format in the size of the PDF sample file in the Paper Format selection.
- Choose the correct orientation (portrait/landscape).
- Select «PDF» at the bottom and then «Save as Adobe PDF».
- Select «PDF/X-1a:2001» in the Adobe PDF settings.